 WhatsApp Us Now

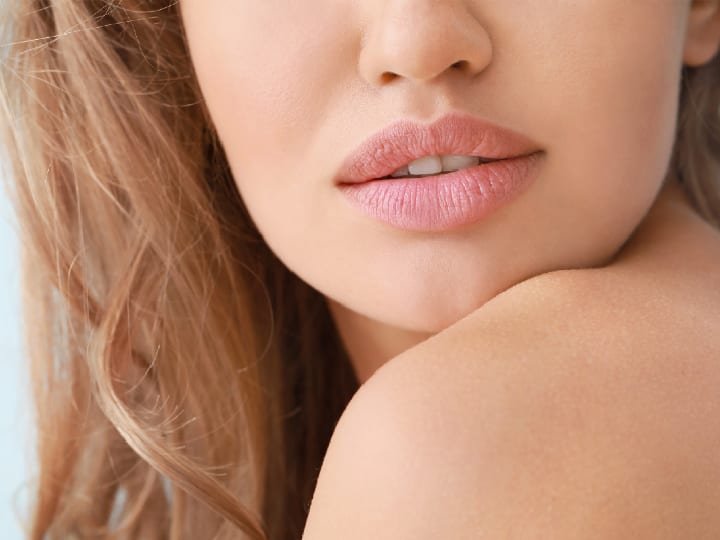
Achieving balanced, natural-looking lip volume requires both precision and an understanding of how modern dermal formulations interact with delicate facial tissue. For individuals exploring aesthetic enhancements, choosing Perfectha Fillers for Lips in Abu Dhabi offers a structured, minimally invasive pathway to refining lip contours and restoring lost hydration. By breaking down every phase of the session from initial preparation to the final gentle molding, anyone considering this cosmetic approach can walk into their appointment feeling completely informed and confident.
- Focused Aesthetic Goals: The procedure centers on enhancing natural lip contours, restoring youthful hydration, and improving overall facial harmony.
- Minimally Invasive Approach: As a non-surgical dermal filler session, the process relies on precise, small-scale injections rather than invasive techniques.
- Predictable Timeline: Understanding each step—from facial mapping to post-session care—removes uncertainty and prepares you for what to expect in the chair.
Understanding the Formulation Behind the Treatment
Before stepping into the treatment room, it helps to understand what makes this specific hyaluronic acid gel behave the way it does once placed beneath the skin. Perfectha utilizes a specialized manufacturing process known as E-BRID technology, which creates covalent bonds within non-animal stabilized hyaluronic acid. Because hyaluronic acid is a hydrophilic molecule naturally present in the human body, it binds readily with water molecules upon placement, creating immediate softness, elasticity, and plumpness without feeling rigid or artificial.
- E-BRID Cross-Linking: This advanced formulation technique links hyaluronic acid particles together, giving the gel smooth consistency and structural resilience.
- Natural Water Retention: Because the gel attracts moisture, it hydrates the delicate lip tissue from within while smoothing subtle vertical lines around the mouth.
- Flexible Tissue Integration: The smooth texture allows the gel to settle evenly into the lip structure, preserving natural movement when smiling, speaking, or resting.
Phase 1: Initial Assessment and Facial Mapping
Every lip enhancement session begins well before any gel is introduced, starting with a detailed evaluation of your natural lip anatomy and facial proportions. During this stage, the aesthetic specialist examines your upper and lower lip ratios, Cupid’s bow definition, philtrum columns, and oral commissures. You will discuss whether your primary objective is subtle hydration, sharper border definition, correcting slight asymmetry, or building noticeable overall volume.
- Anatomical Evaluation: Your natural lip shape, existing volume, and muscle movement are carefully observed to design a customized enhancement blueprint.
- Proportion Planning: Ratios between the upper and lower lips are measured so that added volume complements your surrounding facial features harmoniously.
- Visual Documentation: Reference photographs are commonly taken prior to starting so you can clearly compare your baseline structure with your refreshed appearance afterward.
Selecting the Ideal Gel Consistency
Different formulations within the Perfectha line feature varying particle sizes and concentrations designed for distinct depths and structural needs. Depending on whether you want crisp definition along the vermilion border or plush volume within the body of the lip, the appropriate gel density is chosen during this planning phase.
- Fine Border Definition: Lighter formulations work seamlessly along the lip line and Cupid’s bow to create crisp, subtle edges.
- Deep Structural Plumping: Denser cross-linked gels are selected when the goal is adding noticeable fullness and projection to thin or aging lips.
- Customized Volume Control: The exact milliliter amount is predetermined to avoid overcorrection and ensure balanced, proportional results.
Phase 2: Cleansing and Comfort Preparation
Once your aesthetic blueprint is finalized, the focus shifts entirely to hygiene and personal comfort. You will be seated in a comfortable semi-reclined position—typically around a 45-degree angle—which allows gravity to keep your facial tissues in their natural resting alignment. Any lip balm, makeup, or surface oils are thoroughly removed, and the skin around the mouth is sanitized using a gentle antiseptic solution.
- Ergonomic Positioning: Sitting at a slight incline ensures your lips sit naturally, helping the specialist judge symmetry accurately throughout the session.
- Thorough Sanitization: Cleansing the perioral area establishes a clean, sterile field before the procedure begins.
- Topical Numbing Application: A specialized topical anesthetic cream is smoothed generously over the lips and left to absorb for approximately 15 to 30 minutes.
How Comfort Is Maintained Throughout the Session
Because the lips contain a high concentration of nerve endings, numbing preparation is treated as an essential step rather than an afterthought. In addition to the topical numbing cream taking effect prior to the first touch, many hyaluronic acid formulations also incorporate a mild local numbing agent directly within the gel itself to keep the tissue relaxed as the session progresses.
- Pre-Procedure Numbing: Allowing sufficient time for the topical cream to work ensures the surface of the lips feels dull and relaxed.
- Built-In Gel Comfort: Formulations containing lidocaine further soothe the tissue internally with every micro-deposit placed.
- Cooling Compresses: Brief applications of cold packs may be used between passes to keep the area calm and refreshed.
Phase 3: Strategic Marking and Precision Placement
After wiping away the numbing cream and re-sanitizing the skin, the specialist maps out tiny, strategic reference points along your lips. Using an ultra-fine needle or a blunt-tipped micro-cannula, small, controlled amounts of Perfectha gel are introduced slowly into targeted zones. Rather than filling the entire lip uniformly, the placement follows anatomical landmarks to sculpt shape, lift corners, and build central projection.
- Precision Mapping: Marking exact entry points guarantees balanced placement across both the left and right sides of the mouth.
- Controlled Micro-Deposits: Tiny quantities of gel—often fractions of a milliliter per point—are placed steadily to maintain complete control over shape.
- Layered Depth Accuracy: Placing the filler at the proper tissue depth prevents surface irregularities and ensures a naturally soft feel.
Sculpting Key Anatomical Landmarks
To achieve a refined silhouette rather than an overfilled appearance, the injection sequence targets distinct structural subunits of the upper and lower lips. Each zone serves a specific aesthetic purpose, working together to frame your smile naturally.
- Cupid’s Bow and Philtrum Columns: Vertical micro-threads reinforce the natural peaks of the upper lip and sharpen the ridges extending toward the nose.
- Vermilion Border: Subtle tracing along the outer edge defines the transition between the lip and surrounding skin, preventing lipstick bleed and framing the mouth.
- Central Lip Tubercles: Small, strategic deposits in the body of the upper and lower lips create plush, pillowy volume where fullness naturally concentrates.
- Oral Commissures: Light structural support at the outer corners gently lifts downward-turning edges for a more rested, approachable expression.
Phase 4: Gentle Molding and Symmetry Check
Once the planned volume has been placed, the specialist pauses to gently massage and mold the lips using clean, gloved fingertips. This tactile step ensures the hyaluronic acid gel distributes smoothly through the tissue fibers without forming tiny pockets or uneven ridges. You will then be handed a mirror to inspect your reflection from front and side angles while your face is both relaxed and smiling.
- Even Gel Distribution: Light manual shaping blends the product seamlessly into surrounding lip tissue for a velvety, uniform texture.
- Real-Time Mirror Review: Checking your lips in a mirror allows you to verify symmetry and provide immediate feedback before concluding.
- Fine-Tuning Adjustments: If a tiny area requires an extra touch of balance, minor refinements can be completed right on the spot.
Phase 5: Immediate Post-Session Care and Settling
The entire in-chair appointment typically concludes within 20 to 30 minutes, allowing you to return to your normal daily schedule right away. Before you leave, the treated area is cleansed once more with sterile saline, and a soothing balm or brief cool compress is applied. Over the following few days, the hyaluronic acid continues binding with water molecules in your tissue, settling into its final, softest contour within one to two weeks.
- Quick Appointment Duration: Most sessions wrap up in roughly half an hour, fitting easily into a busy daytime schedule.
- Simple Daily Routine Habits: Drinking plenty of water, keeping lips hydrated with gentle balm, and avoiding extreme heat or strenuous workouts for the first 24 hours help the gel settle smoothly.
- Gradual Refinement: While enhanced shape is visible immediately, the final, natural feel emerges once the gel fully integrates with your lip tissue over the first two weeks.
Frequently Asked Questions
How long does a Perfectha lip filler appointment usually take from start to finish?
A complete session generally takes between 30 and 45 minutes in total. Roughly 15 to 20 minutes are dedicated to facial assessment, cleansing, and allowing the topical numbing cream to take full effect, while the actual placement and gentle molding of the filler typically take less than 20 minutes.
Will my lips still feel soft and move naturally after Perfectha filler is placed?
Yes, Perfectha is formulated with E-BRID cross-linking technology specifically designed to mimic the natural elasticity of soft tissue. Once the gel integrates with your lip structure, it remains flexible and supple, allowing you to smile, speak, and make everyday facial expressions without stiffness.
How soon after the treatment can I apply lipstick or regular lip balm?
It is best to avoid applying lipstick, lip gloss, or cosmetic liners for at least 24 hours after your session so the tiny entry points can close cleanly. During that first day, sticking strictly to a clean, gentle hydrating balm recommended during your visit keeps the surface comfortable.
How long do the hydrating and volumizing effects of Perfectha lip fillers last?
On average, the visible fullness and hydration from Perfectha lip fillers last between 6 and 12 months. Because hyaluronic acid is gradually broken down by the body over time, individual longevity varies slightly depending on your natural metabolic rate, hydration habits, and daily lifestyle.


