 WhatsApp Us Now
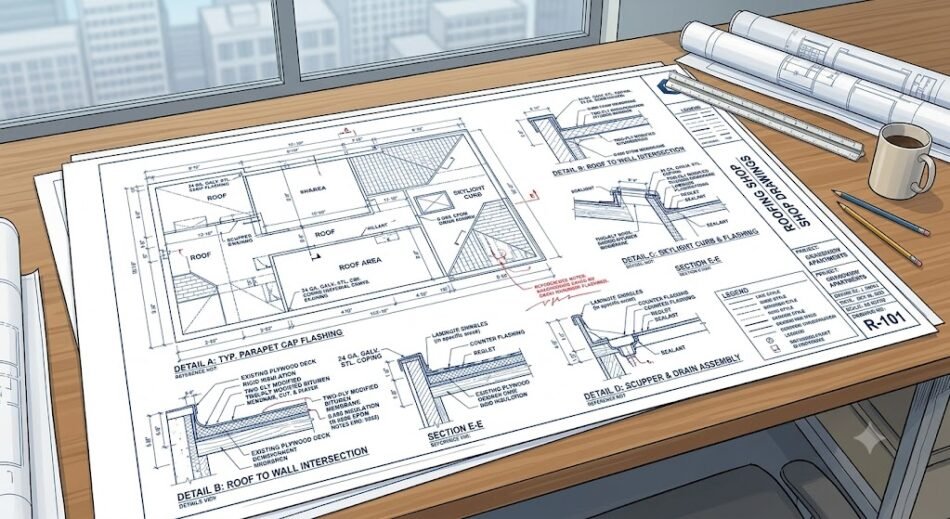
Roofing systems involve much more than the visible roof surface. A commercial roof assembly can include membranes, insulation, structural components, flashing, drains, curbs, penetrations, edge conditions, equipment supports, and numerous connections that must work together as a complete system.
This is why roofing shop drawings are an important part of construction documentation. They translate the design and specification requirements into detailed information that contractors, fabricators, installers, architects, and other project teams can use during construction.
A well-prepared roofing shop drawing package should clearly communicate the location, dimensions, materials, assemblies, interfaces, and installation-related information required for the roofing scope. The exact requirements vary by project, roof system, manufacturer, jurisdiction, and contract documents.
What Are Roofing Shop Drawings?
Roofing shop drawings are detailed technical drawings prepared to explain how a specific roofing system or roof-related component is intended to be fabricated, assembled, coordinated, and installed.
Architectural drawings generally establish the overall design intent and building geometry. Roofing shop drawings provide additional detail for the roofing trade.
Depending on the project, they may document:
- Roof plans
- Roof slopes and drainage
- Roof assembly build-ups
- Insulation layouts
- Membrane layouts
- Flashing details
- Roof edges
- Parapets
- Roof penetrations
- Roof drains and scuppers
- Expansion joints
- Equipment curbs
- Roof access components
- Copings and edge metal
- Fastening patterns
- Material information
- Connection details
- Installation requirements
The drawing package should be developed from the latest applicable architectural drawings, structural information, specifications, manufacturer requirements, and field conditions.
Why Are Roofing Shop Drawings Important?
Roofing is highly dependent on accurate detailing and coordination. A roof may contain numerous transitions where different materials and building systems meet.
For example, a commercial roof may need to coordinate with:
- HVAC equipment
- Plumbing penetrations
- Electrical conduits
- Structural steel
- Roof drains
- Skylights
- Parapets
- Curtain walls
- Mechanical curbs
- Access hatches
- Expansion joints
If these conditions are not clearly documented, installation teams may need additional clarification during construction.
Roofing shop drawings provide a detailed reference for reviewing these conditions before work progresses.
1. They Clarify Roof Geometry
Roof plans can communicate the overall configuration of the roofing system, including roof areas, slopes, high and low points, drainage locations, and transitions.
Clear documentation of roof geometry helps the construction team understand how different roof areas relate to one another.
Important information may include:
- Roof elevations
- Slope direction
- Slope percentages
- Ridge locations
- Valleys
- Drainage paths
- Roof boundaries
- Changes in elevation
- Roof area identification
2. They Document Roofing Assemblies
A roof is usually composed of multiple layers rather than a single material.
A typical assembly may include:
- Structural deck
- Vapor control layer where applicable
- Insulation
- Cover board
- Waterproofing or roofing membrane
- Protection or surfacing layer where specified
The exact assembly depends on the project.
Shop drawings can illustrate these layers through sections and enlarged details. They can also identify the thickness and type of applicable materials.
This information helps project teams understand how the roof assembly is intended to be constructed.
3. They Show Material Specifications
Roofing shop drawings should identify the materials relevant to the documented scope.
Depending on the roofing system, this could include:
- Roofing membrane
- Insulation
- Cover board
- Underpayment
- Vapor retarder
- Flashing materials
- Sheet metal
- Fasteners
- Adhesives
- Sealants
- Edge metal
- Coping
- Drain components
Material information should correspond with the project specifications and approved product requirements.
When a manufacturer-specific system is required, the shop drawing documentation should reflect the applicable manufacturer’s installation requirements.
4. They Show Roof Drainage
Water management is one of the most important aspects of roof design and installation.
Roofing shop drawings can show the relationship between roof slopes and drainage components such as:
- Internal roof drains
- Scuppers
- Gutters
- Downspouts
- Overflow drains
- Crickets
- Saddles
- Valleys
Drainage plans can identify the direction of water flow and the location of drainage points.
Where required by the design, shop drawings may also show localized slope conditions around roof penetrations and equipment.
5. They Detail Roof Flashing
Flashing are used at numerous roof transitions and penetrations.
Roofing shop drawings may document flashing conditions at:
- Parapet walls
- Roof edges
- Curbs
- Drains
- Pipes
- Ducts
- Equipment
- Skylights
- Expansion joints
- Wall intersections
- Penetrations
These details are important because transitions between different building components can create potential water-management challenges.
A properly documented flashing detail can show the relationship between the membrane, substrate, counter flashing, metal components, sealants, and adjacent construction.
6. They Show Roof Edge Conditions
Roof edges can contain several components that need to work together.
Depending on the project, shop drawings may document:
- Metal edge profiles
- Fascia
- Coping
- Gravel stops
- Drip edges
- Fascia termination
- Membrane termination
- Fasteners
- Blocking
- Adjacent wall conditions
The drawing should make the intended relationship between the roof assembly and edge components clear.
7. They Document Parapet Conditions
Commercial buildings frequently incorporate parapet walls around portions of the roof.
Shop drawings may provide enlarged sections showing:
- Parapet height
- Roof membrane termination
- Insulation
- Coping
- Flashing
- Counter flashing
- Blocking
- Wall construction
- Sealant
- Edge conditions
Because parapets connect roof and wall assemblies, clear detailing is particularly useful for coordination.
8. They Identify Roof Penetrations
Roof penetrations are common on commercial projects.
Examples include:
- Plumbing pipes
- HVAC ducts
- Electrical conduits
- Exhaust systems
- Equipment supports
- Structural supports
- Ventilation components
- Access systems
Roofing shop drawings can identify penetration locations and provide enlarged details for the corresponding flashing and sealing conditions.
Coordination with other trades is important because penetration locations may change during project development.
9. They Show Mechanical Equipment and Curbs
Commercial roofs often contain HVAC units and other mechanical equipment.
Roofing documentation may show:
- Equipment curbs
- Equipment locations
- Curb dimensions
- Flashing
- Membrane termination
- Equipment support conditions
- Insulation transitions
- Adjacent roof slopes
The roofing drawings should coordinate with the latest mechanical and structural information.
This helps avoid situations where equipment locations conflict with roof drains, structural elements, or other roof components.
10. They Include Roof Sections and Enlarged Details
Roof plans communicate the overall layout, but many construction conditions require additional detail.
Sections can illustrate:
- Roof assembly thickness
- Insulation layers
- Membrane
- Deck
- Flashing
- Parapet conditions
- Roof edges
- Drainage components
- Penetrations
- Equipment curbs
Enlarged details are particularly useful for complicated transitions.
For example, a roof-to-wall transition may require a dedicated detail to show how the roofing membrane connects to the wall assembly.
Information Commonly Included in Roofing Shop Drawings
Although requirements vary, a commercial roofing shop drawing package may contain the following information.
| Information | Purpose |
|---|---|
| Roof plan | Shows overall roofing layout |
| Roof dimensions | Establishes component locations and sizes |
| Slopes | Shows drainage direction and roof geometry |
| Drain locations | Identifies primary drainage points |
| Scuppers and gutters | Documents secondary or perimeter drainage |
| Roof assembly | Identifies layers and materials |
| Insulation layout | Shows insulation placement and thickness |
| Membrane layout | Documents membrane arrangement |
| Flashing details | Explains transition conditions |
| Roof edge details | Documents edge metal and termination |
| Parapet details | Shows roof-to-wall conditions |
| Penetration details | Documents pipes, ducts, and other penetrations |
| Curb details | Coordinates mechanical equipment |
| Expansion joint details | Documents movement-related conditions |
| Fastening information | Identifies applicable attachment requirements |
| Material specifications | Identifies products and components |
| Notes | Communicates project-specific requirements |
Roof Assembly Details
A roofing shop drawing should provide enough information to understand the proposed assembly.
For example, a roof section might identify:
Roofing membrane
↓
Cover board
↓
Rigid insulation
↓
Vapor retarder, where applicable
↓
Structural roof deck
The actual configuration should always follow the project’s specifications and approved roofing system.
The drawing may also identify thicknesses, product references, attachment methods, and transitions between different assemblies.
Insulation Layouts
Insulation plays an important role in roof performance and drainage.
Roofing shop drawings may document:
- Insulation type
- Thickness
- Board dimensions
- Tapered insulation
- Crickets
- Saddles
- Drainage slopes
- Insulation transitions
- Board layout
- Attachment method
Tapered insulation layouts can be particularly useful when the roof design relies on insulation to create drainage slopes.
Membrane Layout and Seams
For membrane roofing systems, shop drawings may identify membrane layout and important seam or termination conditions.
Depending on the system, documentation may show:
- Membrane direction
- Sheet layout
- Seam locations
- Perimeter measurement
- Fastener patterns
- Membrane terminations
- Flashing transitions
- Penetration conditions
The specific installation method depends on the roofing system and manufacturer requirements.
Fasteners and Attachment Details
Roofing systems may use mechanical fasteners, adhesives, or other attachment methods.
Where applicable, shop drawings can identify:
- Fastener types
- Fastener locations
- Attachment patterns
- Plates
- Clips
- Adhesive requirements
- Perimeter measurement
- Substrate conditions
These details should correspond with the approved system and applicable project requirements.
Coordination With Other Construction Drawings
Roofing shop drawings should not be prepared independently of the rest of the construction documentation.
Coordination may involve reviewing:
Architectural Drawings
Used to verify:
- Roof geometry
- Parapets
- Roof openings
- Building elevations
- Architectural finishes
Structural Drawings
Used to coordinate:
- Roof deck
- Structural framing
- Equipment supports
- Curbs
- Penetrations
- Blocking
Mechanical Drawings
Used to coordinate:
- HVAC units
- Duct work
- Equipment curbs
- Exhaust systems
- Roof penetrations
Plumbing Drawings
Used to coordinate:
- Roof drains
- Vent pipes
- Overflow systems
- Plumbing penetrations
Electrical Drawings
Used to coordinate:
- Conduits
- Equipment
- Rooftop electrical systems
- Penetrations
Coordination is particularly important on commercial projects where several trades work within the same roof area.
Common Roofing Shop Drawing Details
Some of the most frequently documented roofing conditions include:
Roof-to-Wall Detail
Shows the transition between the roofing assembly and an adjacent wall.
Roof Edge Detail
Documents the termination of the roof system at the perimeter.
Parapet Detail
Shows membrane termination, flashing, coping, and related components.
Roof Drain Detail
Shows the relationship between the roof membrane, drain assembly, insulation, and substrate.
Pipe Penetration Detail
Documents how the roofing system transitions around pipes.
Equipment Curb Detail
Shows the relationship between roofing materials and mechanical equipment supports.
Expansion Joint Detail
Documents movement-related transitions between roof sections or building components.
Scupper Detail
Shows how roof drainage passes through a parapet or wall.
These details should be customized to the actual project rather than copied without reviewing the specific conditions.
Common Problems Caused by Incomplete Roofing Shop Drawings
Insufficient roofing documentation can contribute to coordination and installation problems.
Unclear Drainage
If slopes, drains, or drainage paths are not clearly documented, the installation team may require additional clarification.
Missing Penetration Details
Undocumented penetrations can create uncertainty around flashing and membrane termination.
Incomplete Edge Conditions
Roof perimeter conditions can be difficult to install when edge metal, blocking, membrane termination, or flashing requirements are unclear.
Conflicting Equipment Locations
Mechanical equipment can conflict with drains, structural framing, or roof features if coordination is incomplete.
Inconsistent Material Information
Different documents may contain different product or assembly information if revisions are not properly coordinated.
Outdated Drawings
Using superseded architectural, structural, or MEP information can result in shop drawings that no longer match current project conditions.
Best Practices for Preparing Roofing Shop Drawings
Start With the Latest Project Information
Before drafting, verify the current revision of:
- Architectural drawings
- Structural drawings
- MEP drawings
- Specifications
- Manufacturer information
- Field measurements, where applicable
Use Clear Drawing Organization
Use logical sheet numbering, detail references, notes, dimensions, and drawing titles.
Maintain Consistent Standards
Maintain consistent:
- Line weights
- Layers
- Symbols
- Dimension styles
- Text
- Detail numbering
- Drawing references
Identify Critical Transitions
Pay particular attention to locations where different assemblies or trades meet.
Coordinate Before Fabrication or Installation
Review important roof conditions against the relevant drawings before the documentation is finalized.
Maintain Revision Control
Clearly identify revisions and update all affected details rather than changing only one drawing.
CAD and BIM for Roofing Shop Drawings
Roofing documentation can be prepared using CAD or BIM workflows depending on project requirements.
CAD Roofing Drawings
CAD is commonly used for:
- Roof plans
- Details
- Sections
- Flashing drawings
- Edge details
- Installation documentation
CAD provides a practical way to develop precise two-dimensional construction documentation.
BIM-Based Roofing Documentation
BIM can provide additional three-dimensional coordination capabilities.
A BIM workflow can help teams visualize relationships between:
- Roof assemblies
- Structural framing
- HVAC equipment
- Plumbing
- Architectural elements
- Penetrations
- Roof drains
The appropriate workflow depends on the project’s BIM requirements and available model information.
Roofing Shop Drawings for Commercial Projects
Commercial roofing projects can contain numerous roof areas and construction conditions. A single building may have multiple roof assemblies, slopes, equipment zones, drainage systems, parapets, and penetrations.
For these projects, roofing shop drawings can help organize the information into a coordinated documentation package.
They can be particularly useful for:
- Office buildings
- Retail facilities
- Hotels
- Restaurants
- Warehouses
- Industrial buildings
- Healthcare facilities
- Educational buildings
- Multifamily developments
- Mixed-use developments
The complexity of the drawing package should reflect the complexity of the roofing system and project requirements.
Roofing Shop Drawings vs. Architectural Roof Plans
Architectural roof plans and roofing shop drawings serve related but different purposes.
| Architectural Roof Plan | Roofing Shop Drawing |
|---|---|
| Communicates overall design intent | Provides detailed roofing trade information |
| Shows roof geometry | Develops detailed roof system conditions |
| Identifies major roof components | Details assemblies, transitions, and installation conditions |
| Covers overall building design | Focuses on roofing scope |
| May not show every roofing detail | Includes enlarged roofing details |
Roofing shop drawings should complement the contract documents and provide the additional technical information required for the roofing scope.
Conclusion
Roofing shop drawings provide detailed technical information that helps construction teams understand how roofing systems, materials, drainage components, flashing, penetrations, edges, curbs, and transitions are intended to be constructed.
A complete roofing shop drawing package may include roof plans, assembly sections, insulation layouts, membrane layouts, drainage information, flashing details, roof edge conditions, parapets, penetrations, equipment curbs, and other project-specific details.
The most useful roofing drawings are not simply detailed—they are accurate, coordinated, clearly organized, and based on the latest applicable project information.
For contractors, architects, roofing subcontractors, fabricators, and construction teams, this level of documentation can provide a clearer technical reference throughout the review, coordination, fabrication, and installation stages of a commercial roofing project.


