 WhatsApp Us Now
Introduction
In precision engineering and manufacturing, accurate thread measurement is crucial to ensuring compatibility and reliability in mechanical assemblies. The Whitworth thread gauge is an essential tool for checking the pitch and thread form of Whitworth threads. This blog will guide you through the correct usage of a Whitworth thread gauge to achieve precise measurements, helping you avoid costly errors and mismatched fittings.
Understanding the Whitworth Thread Gauge
A Whitworth thread gauge is a measuring tool designed to identify the pitch of Whitworth threads, which follow a specific 55-degree thread angle. These threads were originally developed by Sir Joseph Whitworth in 1841 and have since become a standard for various applications, including pipes, bolts, and fasteners.
Whitworth thread gauges come in different types, including:
- Thread pitch gauges: Used to determine the number of threads per inch (TPI).
- Plug gauges: Used to check internal thread accuracy.
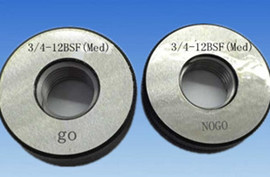
- Ring gauges: Used to verify external thread compliance.
Tools Needed
Before you start measuring with a Whitworth thread gauge, ensure you have the following tools:
- A Whitworth thread pitch gauge
- A caliper or micrometer for additional diameter measurement
- A thread chart for reference
- A light source or magnifier for better visibility
- The workpiece (bolt, nut, or threaded component) to be measured
Step-by-Step Guide to Using a Whitworth Thread Gauge
Step 1: Clean the Threaded Component
Before using the thread gauge, ensure that the component you are measuring is free from dirt, rust, oil, or debris. Contaminants can affect the accuracy of the measurement and lead to incorrect identification of the thread pitch.
Step 2: Identify the Thread Type
Confirm that the component has Whitworth threads. These threads have a distinctive 55-degree thread angle, which differentiates them from other thread types, such as metric or Unified threads. If you are unsure, compare the thread profile with a Whitworth thread chart.
Step 3: Measure the Major and Minor Diameters
Use a caliper or micrometer to measure the major diameter (for external threads) or the minor diameter (for internal threads). Comparing these measurements with standard Whitworth thread charts will help narrow down the possible thread sizes.
Step 4: Select the Correct Thread Pitch Gauge
A Whitworth thread pitch gauge consists of multiple leaves, each marked with a different pitch value in threads per inch (TPI). Select a gauge that appears to match the thread pitch and try fitting it onto the threaded section.
Step 5: Match the Thread Pitch
Gently place the selected gauge onto the threads of the component. If the gauge does not align perfectly with the threads, try another pitch size until you find the perfect match. The correct gauge should fit snugly without gaps or misalignment.
Step 6: Verify the Fit
Once you have found a matching gauge, double-check the alignment under a magnifying glass or with proper lighting. Ensure that the gauge teeth sit perfectly within the thread valleys without excessive movement.
Step 7: Cross-Reference with a Thread Chart
To confirm your measurement, compare your results with a standard Whitworth thread chart. Match the TPI and measured diameters to determine the exact thread size.
Step 8: Use a Plug or Ring Gauge for Final Verification
If necessary, use a plug gauge (for internal threads) or a ring gauge (for external threads) to ensure that the thread meets the required tolerance and specifications. This additional step provides a more comprehensive validation of the thread’s accuracy.
Common Mistakes to Avoid
- Using the wrong gauge type – Ensure you are using a Whitworth thread gauge and not a metric or Unified gauge.
- Skipping the cleaning step – Dirt and debris can interfere with accurate measurements.
- Forcing the gauge onto the thread – The gauge should fit naturally without applying excessive force.
- Misreading the pitch – Always cross-reference with a thread chart to avoid errors.
- Ignoring diameter measurements – Only checking the pitch without measuring diameters can lead to incorrect identification.
Applications of Whitworth Thread Gauges
Whitworth thread gauges are commonly used in:
- Automotive engineering: Checking bolts and fasteners in classic British cars.
- Plumbing: Measuring pipe threads to ensure compatibility.
- Machining and manufacturing: Ensuring that parts comply with Whitworth thread standards.
- Aerospace industry: Validating threads on aircraft components requiring legacy thread systems.
Conclusion
Using a Whitworth thread gauge correctly ensures that your threads are measured with precision, preventing errors and ensuring compatibility in mechanical assemblies. By following the steps outlined in this guide, you can achieve accurate measurements and maintain high-quality workmanship. Contact, Whether you work in engineering, manufacturing, or maintenance, mastering the use of a Whitworth thread gauge is an invaluable skill that contributes to efficiency and reliability in your projects


