
A well-maintained deck not only enhances the beauty of your home but also provides a safe outdoor space for memorable family gatherings. In this comprehensive guide, we share expert techniques on how to restain a deck without stripping, preserving the natural character of your wood while protecting it from the elements. Our step-by-step approach will ensure that your deck looks refreshed and rejuvenated without the time-consuming process of completely stripping the old finish.
Understanding Your Deck’s Condition
Before you begin, it’s essential to assess the current state of your deck. Look for:
- Areas of wear and tear: Check for splintered, cracked, or rotted wood.
- Type of existing stain: Determine if the previous stain is transparent, semi-transparent, or solid.
- Surface preparation needs: In most cases, a thorough cleaning, light sanding, and repair of damaged boards are enough to prepare your deck for a new coat of stain.
A detailed inspection will help you decide whether a full stripping is necessary or if a simple restaining can breathe new life into your deck.
Advantages of Restaining Without Stripping
Restaining without stripping offers several benefits:
- Time and cost efficiency: Skipping the stripping step saves both time and money.
- Preservation of wood texture: By retaining some of the old stain, you can maintain the natural wood grain and character.
- Reduced mess and cleanup: Avoid the dust, debris, and chemical residues that come with stripping.
Using the right techniques and products, you can achieve a durable, even finish without completely removing the previous layer.
Step 1: Thorough Deck Cleaning
Cleaning is the most critical step before applying a new stain. We recommend the following process:
- Clear the Deck: Remove all furniture, planters, and accessories.
- Sweep and Remove Debris: Use a stiff broom or leaf blower to eliminate loose dirt and debris.
- Power Wash or Scrub: Lightly pressure wash (keeping a safe distance) or scrub the deck using a deck cleaner. This removes surface contaminants such as mildew and old stain residues without damaging the wood.
- Rinse and Dry: Rinse thoroughly with water and allow the deck to dry completely for at least 48 hours. Adequate drying ensures that the new stain adheres evenly.
Remember, proper cleaning is essential to achieve a long-lasting finish and to avoid patchy areas after restaining.
Step 2: Light Sanding and Repairs
Even if you choose not to strip the deck completely, light sanding is recommended:
- Scuff Sanding: Use a medium-grit sandpaper (80 to 120 grit) to lightly scuff the surface. This roughens up the existing stain, promoting better adhesion of the new coat.
- Repair Damaged Areas: Replace any splintered or rotten boards and secure loose screws or nails. Repairing imperfections ensures a smooth, uniform finish and prevents future deterioration.
- Clean Up Dust: Remove all sanding dust using a vacuum or broom. A dust-free surface is critical for a flawless application of the stain.
Step 3: Choosing the Right Stain
Selecting the ideal wood stain for your deck is paramount to achieving a professional finish. Consider the following factors:
- Type of Finish: Semi-transparent stains are popular because they enhance the natural grain while offering protection. Solid stains can also be used if you desire a more uniform, opaque look.
- Quality and Durability: Invest in a high-quality, oil-based or water-based stain that offers excellent UV protection, moisture resistance, and long-term durability.
- Compatibility: Ensure the new stain is compatible with the previous finish. Most semi-transparent or clear finishes can be restained without stripping, whereas a solid stain may require more prep if the old coating is peeling.
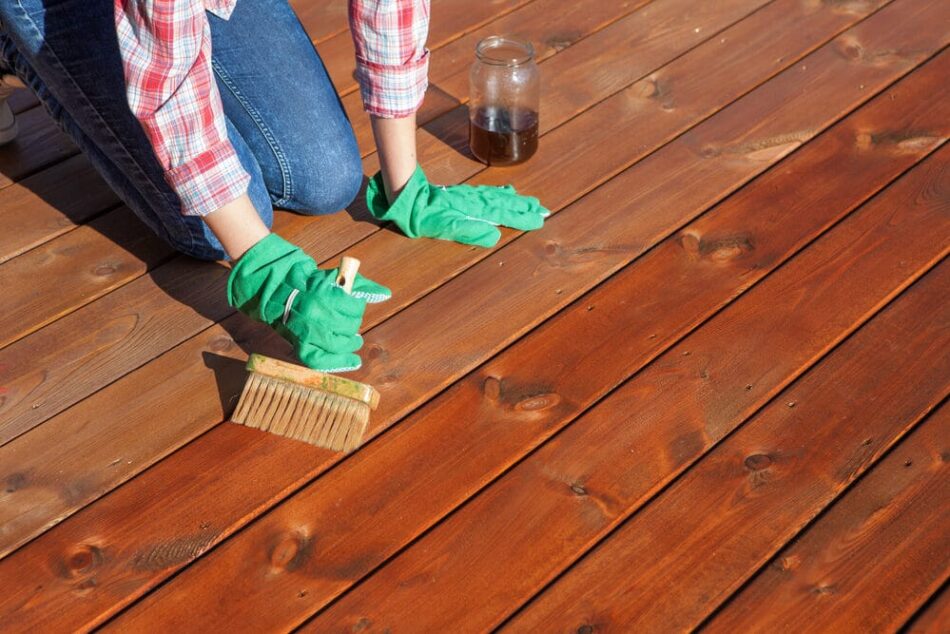
Step 4: Stain Application Techniques
For an even, professional finish, we suggest the following tips during application:
- Use the Right Tools: Opt for high-quality brushes, rollers, or a paint pad applicator attached to a pole. Each tool plays a vital role in reaching different areas of the deck.
- Work in Sections: Divide your deck into manageable sections and work methodically. Begin at one end and continue until the entire deck is covered, maintaining a “wet edge” to prevent lap marks.
- Follow the Wood Grain: Apply the stain in the direction of the wood grain for a smooth and consistent finish.
- Thin, Even Coats: Avoid over-application. Apply thin, even layers and allow sufficient drying time between coats (as per the manufacturer’s guidelines).
- Edge and Detail Work: Use a smaller brush for tight spaces, corners, and around railings to ensure every nook is properly covered.
Step 5: Finishing Touches and Maintenance
Once the new stain is applied, the finishing touches are crucial for long-term protection:
- Allow Proper Drying Time: Ensure the stain dries completely before placing any furniture or walking on the deck. This can take 24 to 48 hours depending on the weather.
- Inspect and Touch Up: After drying, inspect the deck for any missed spots or uneven coverage. Touch up as necessary to ensure a uniform appearance.
- Regular Maintenance: To keep your deck looking fresh, we recommend regular cleaning and annual inspections. Applying a maintenance coat every few years will extend the life of the stain and protect the wood from UV damage and moisture.
Tips for a Successful Restaining Project
- Plan for the Weather: Choose a period with stable, dry weather for at least a few days to allow proper drying.
- Invest in Quality Products: High-quality cleaning solutions and stains will yield better results and require fewer touch-ups.
- Test a Small Area: Before applying the stain to the entire deck, test a small hidden section to ensure compatibility and the desired color outcome.
- Stay Consistent: Use consistent techniques throughout the project to avoid uneven application. Consistency in tool use, timing, and method will result in a professional finish.
Conclusion
Restaining a deck without stripping is an efficient and cost-effective way to revitalize your outdoor space. By carefully cleaning, lightly sanding, selecting the right stain, and applying it with precision, you can achieve a durable and attractive finish that protects your wood for years to come.
We believe that with a little preparation and attention to detail, every deck can become a beautiful extension of your home. Embrace these expert techniques, and enjoy a refreshed, safe, and inviting outdoor area.


