
Whether you’re a biker, part of a club, or just someone who loves expressing themselves through fashion, patches on leather vests are a timeless way to make a statement. They symbolize identity, heritage, affiliation, or simply personal style. But putting a patch on a leather vest isn’t as straightforward as sewing one on your favorite denim jacket.
In this guide, we’ll walk you through how to put a patch on a leather vest—from choosing the right patch to securing it perfectly. Whether you’re customizing a mens leather vest or styling a unique leather vest womens design, this post has everything you need to do it right the first time.
Why Add a Patch to Your Leather Vest?
Patches are more than decorative. For motorcycle clubs, they represent belonging. For fashion-forward individuals, they showcase creativity. In either case, patches help you stand out and give your leather vest a personalized touch that can’t be bought off the rack.
But unlike fabric, leather is a more delicate material when it comes to sewing or adhesive application. If not done properly, you risk damaging the vest—or worse, losing your patch in the wind.
Types of Patches for Leather Vests
Before you start, it’s important to know the kind of patch you’re working with. Here are the main types:
1. Sew-On Patches
These are classic and durable. They require a bit more effort and tools but tend to last longer. Ideal for both mens leather vest and leather vest womens pieces.
2. Iron-On Patches
These come with heat-activated adhesive. However, leather doesn’t respond well to high heat, so you’ll need to use caution. Ironing directly on leather can cause permanent damage.
3. Velcro or Snap-On Patches
Great for temporary options, like switching club insignias or designs. You’ll need to pre-sew or glue the base Velcro panel onto your vest.
Tools You’ll Need
For a successful patch job, gather these tools ahead of time:
- Leather needle (hand or machine)
- Heavy-duty polyester thread
- Thimble (for hand sewing)
- Patch(es) of choice
- Leather adhesive (optional for extra hold)
- Ruler or measuring tape
- Chalk or fabric pencil
- Clips or double-sided tape
- Sewing machine (optional but helpful)
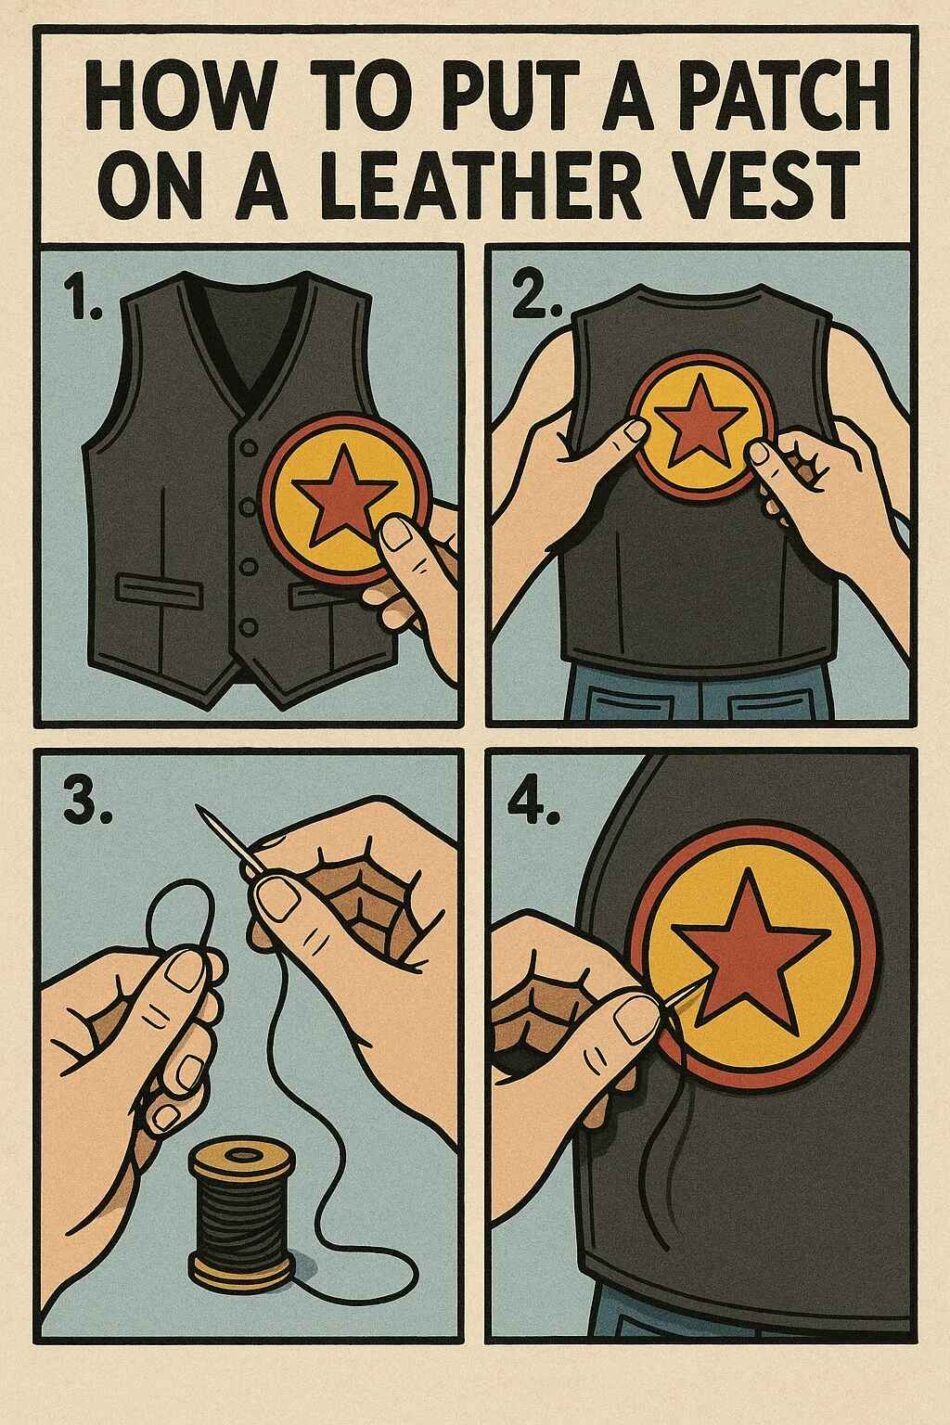
How to Put a Patch on a Leather Vest – Step-by-Step
Let’s get to the good stuff—here’s a simple, beginner-friendly guide.
Step 1: Choose the Right Location
Where you place your patch matters. Common placements include:
- Center back (ideal for large patches)
- Upper front chest (for name or club patches)
- Side panels or lower back
Use a fabric pencil or chalk to outline the patch area, especially if you’re working with a mens leather vest, which typically has a larger surface area. For a leather vest womens design, consider proportions carefully and adjust placement to maintain style balance.
Step 2: Prep the Vest
Lay the vest flat on a hard surface. Use clips or double-sided tape to hold the patch in place. This is especially helpful if you plan to hand sew, as it prevents slipping.
Step 3: Hand Sew (Recommended Method)
- Thread a Leather Needle: Use heavy-duty thread, preferably polyester or nylon.
- Start from Inside: Begin stitching from inside the vest to hide the knot.
- Use a Thimble: Leather is tough. A thimble helps push the needle through.
- Use a Running or Saddle Stitch: Go around the edge, spacing stitches evenly.
- Tie Off Carefully: Finish with a strong knot inside the vest.
Step 4: Optional – Use Leather Adhesive
Want a little extra security? Apply a thin layer of leather jacket adhesive to the back of the patch before sewing. This helps it stay in place during stitching and adds a layer of bonding.
However, avoid relying on glue alone. Over time, adhesives can fail—especially with movement, sweat, or exposure to weather.
Step 5: Finishing Touches
Once stitched, inspect your work. Tug on the patch to ensure it’s secure. If you spot loose threads, seal them with a lighter (quickly and carefully), or tie them off and trim.
Common Mistakes to Avoid
- Using an Iron on Leather: This can warp or discolor the material.
- Skipping Adhesive for Large Patches: Without it, patches may sag or wrinkle.
- Uneven Placement: Measure carefully before committing to a spot.
- Choosing the Wrong Thread: Regular cotton thread may snap easily—always go heavy-duty.
How to Maintain a Patched Leather Vest
- Avoid Overwashing: Leather doesn’t like water. Spot-clean only.
- Condition the Leather: Use a leather conditioner every few months to keep it supple.
- Check Stitching: Give your patches a once-over now and then. If they’re loosening, reinforce them.
Leather Vest Style Tips
When customizing your vest, balance is key. A mens leather vest can carry bold, large designs—think back patches, shoulder emblems, and club logos. Meanwhile, a leather vest womens style often leans toward subtlety and tailored fits. Smaller patches on the chest or along the sides tend to complement the silhouette better.
Want to go bold? Mix and match patch sizes, colors, and textures for a layered, streetwear vibe. For a cleaner look, stick to one theme—like vintage biker, military, or minimalist designs.
Conclusion:
Whether you’re repping a club, showcasing your art, or simply standing out in style, adding a patch to your leather vest is one of the most rewarding DIY projects you can do. It’s about more than just thread and fabric—it’s about identity, history, and self-expression.
If you’re looking for a high-quality leather vest womens or mens leather vest that’s durable and perfect for customization, we highly recommend checking out FMCo NY. They offer premium leather apparel designed with attention to detail and crafted for everyday wear or biker adventures.
