 WhatsApp Us Now
Clear and sharp photos are important in today’s world. Whether you are posting on social media, creating content for a business, or saving personal memories, pictures need to look their best. A blurry or dull image can fail to catch attention, while a sharp and colorful one can stand out immediately. Many people face common problems with their photos, such as poor lighting, faded colors, or lack of detail. The good news is that free photo enhancers can fix these issues quickly and easily, even if you are not an expert in editing.
What is a Photo Enhancer?
A photo enhancer is a tool that improves the quality of pictures with just a few clicks. Instead of spending hours editing manually, you can upload your photo, and the tool will automatically adjust brightness, sharpness, colors, and more. Many modern enhancers use artificial intelligence (AI), which means they can recognize faces, objects, and backgrounds to make smarter adjustments.
The main difference between a photo enhancer and professional editing software is simplicity. Editing software like Photoshop requires skills and practice, while enhancers are designed to be quick and easy. Anyone, even beginners, can use them without confusion.
Why Choose a Free Photo Enhancer?
There are many reasons why free enhancers are popular. First, they save time. You don’t need to adjust every detail yourself because most tools offer one-click options. Second, they are beginner-friendly. Even if you have no knowledge of editing, you can still get professional-looking results.
Another reason is cost. Professional editing programs often require monthly payments or expensive licenses. Free enhancers give you great results without any cost. Most of them are available online or as mobile apps, which makes them very accessible. You can use them on your computer or phone, depending on your needs.
Step-by-Step Guide: How to Use a Free Photo Enhancer
Using a photo enhancer is simple. Here’s a step-by-step guide you can follow:
1. Choose a Reliable Tool
Pick a free enhancer that is trusted and easy to use. Some good examples are Fotor, Pixlr, and Remini.
2. Upload Your Photo
Most enhancers allow you to upload directly from your computer, phone, or even cloud storage.
3. Select Enhance Options
You will usually find an “auto-enhance” button. This option automatically improves brightness, contrast, sharpness, and colors. If you want more control, you can manually adjust features like sharpness, tone, and saturation.
4. Preview the Changes
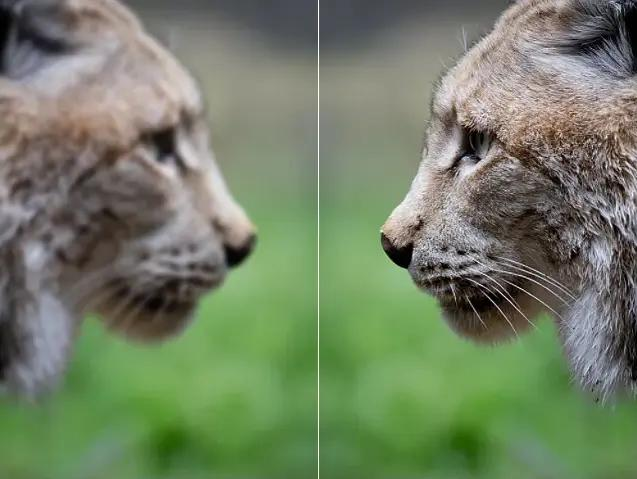
Most tools let you see a before-and-after view. This helps you check if the edits look natural.
5. Save or Download the Final Photo
Once you are happy with the results, you can save the enhanced photo to your device. Make sure you save it in high quality to keep it sharp.
Tips for Getting Sharper and Clearer Pictures
Even though enhancers do most of the work, following a few tips can help you get the best results:
- Start with a High-Quality Photo: Enhancers can improve your pictures, but they work best if the original image is not too blurry or pixelated.
- Avoid Over-Editing: Too much sharpening or color adjustment can make photos look unnatural. Try to keep the final result realistic.
- Use Different Tools for Different Needs: Some apps work better for portraits, while others are great for landscapes or product photos. Don’t hesitate to try more than one tool.
- Check Before and After Views: Always compare the original photo with the enhanced one to see if the changes are an improvement.
Best Free Photo Enhancers to Try
Here are some of the most popular free enhancers that people use to make their pictures look sharper and clearer:
Fotor – Easy to use with one-click enhancement and creative filters.
Pixlr – Online-based editor with both simple and advanced tools.
BeFunky – Offers retouching features and fun creative effects.
Remini – Uses AI to restore old or blurry photos, especially portraits.
Adobe Express (Free Version) – Provides reliable enhancement and design tools.
These tools are trusted by millions of users and are available either as websites or apps. They don’t require long tutorials or technical knowledge, making them perfect for beginners.
Common Mistakes to Avoid
While enhancers are very helpful, there are some common mistakes you should avoid:
- Relying Only on Filters: Filters can change the mood of a picture, but they don’t always make it sharper or clearer. Use actual enhancement features.
- Over-Sharpening: Adding too much sharpness can create a harsh look. Keep it balanced for a natural result.
- Saving in Low Quality: After editing, always save in the highest resolution available. Low-quality saving can undo the improvements.
- Ignoring the Original Photo: Always keep a copy of the original photo in case you want to re-edit or compare results.
Conclusion
Free photo enhancers are powerful tools that can turn ordinary photos into sharp and clear images within seconds. They save time, are easy to use, and don’t cost anything. Whether you want to post better pictures on social media, improve product photos for a business, or simply make your memories look brighter, these tools are the perfect solution.
You don’t need to be an expert or spend money on expensive software. With just a few clicks, anyone can improve photo quality and enjoy professional-looking results. If you want to try one today, check out this Photo Enhancer that makes your pictures sharper, clearer, and more eye-catching instantly.


