 WhatsApp Us Now

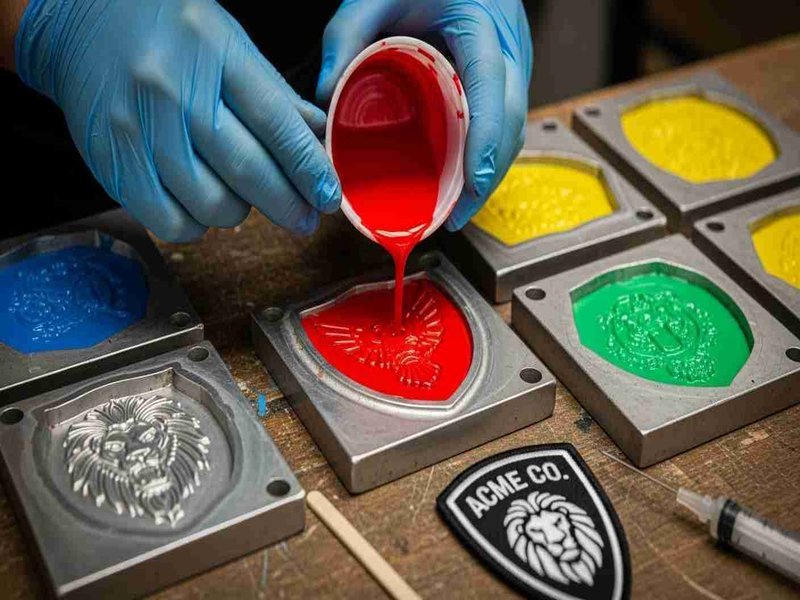
Making PVC patches is a creative and careful process. From the first idea to the final patch, many steps happen inside the factory. In this blog, we will explain how custom PVC patches are made. You will see every stage clearly, from design to the finished product, in a simple and easy way.
Consider a sketch drawn on paper, slowly turning into a colorful, flexible patch. Each patch moves through machinery, skilled hands, and quality assurance. This guide shows the journey of each PVC Patch through the manufacturing process to become a durable, appealing PVC Patch.
How PVC Patches Are Made in a Factory
Turning a simple idea into a real PVC patch takes several steps. In a factory, each stage is done carefully to make sure the patch is strong, colourful, and long-lasting. Let’s look at the process step by step.
Step 1: Share Your Idea and Design
Every patch starts with an idea. You may have a logo, a simple sketch, or just a description. A Custom PVC Patches Factory listens to your idea carefully. They ask about the patch size, shape, colours, and how it will be used. Next, designers make a digital version of your patch. This helps you see how it will look before production. You can ask for changes until you are happy with it.
Step 2: Create a Metal Mould
Once the design is approved, the factory makes a metal mould. This is like a stamp that has all the patch details. Machines cut the design into strong metal. Every line, border, and small detail is carefully shaped.
The mould will be used to make many patches. A good mould is very important. It makes the edges clear and the design clean on every patch.
Step 3: Prepare the PVC Material
After the mould is ready, the factory prepares the PVC material. The PVC comes in a soft, flexible form and can be easily coloured and shaped. Workers mix the colours carefully to match the approved design.
Each colour is placed separately so it can be filled into the right areas of the mould. This step is very important because the final look of the patch depends on the correct colours and consistency of the PVC.
Step 4: Fill the Mould with PVC
Once the PVC is ready, it is poured into the metal mould. The factory fills each section with the correct colour carefully, layer by layer if needed. This step requires attention because even small mistakes can affect the design.
After filling, the mould is checked to make sure all areas are properly covered. At this stage, the patch starts to take its real shape, ready for heating and curing.
Step 5: Heat and Cure the Patch
After the PVC is poured into the mould, it needs to be heated. The factory uses special machines to warm it. Heating makes the PVC hard and strong while keeping its shape and colours.
This step is important because it turns the soft liquid PVC into a solid patch that will last for years. Some factories also use this stage to create other products, like Personalized PVC Rubber Coasters, using the same heating and curing process. Workers check each batch carefully to make sure the patch is not too soft or too hard.
Step 6: Trim and Finish
Once the patch is hardened, it is removed from the mould. The edges are trimmed to make them smooth and neat. Workers add finishing touches like backing options. This could be velcro, glue, or a simple sew-on back, depending on the customer’s preference.
At this stage, every patch is inspected to make sure the colours are correct, the shape is perfect, and the design is clear. Some factories also clean the patch surface and polish it slightly to make it look professional.
Step 7: Quality Check and Final Packaging
Before the patch leaves the factory, it goes through a final quality check. Workers examine every patch carefully to make sure the shape, colours, and details match the original design.
Any patch with mistakes is fixed or discarded.
Only the perfect patches move to the next stage. After checking, the patches are packed safely.
They are sorted according to size, design, or customer order. Some factories also wrap the patches individually or in sets, ready for delivery.
This step ensures that the final product looks professional and reaches the customer in perfect condition.
Frequently Asked Questions
1. What is the time duration for making a PVC patch?
Usually, the entire process of designing, molding, filling, heating, and applying a finish to the patch can take 3 to 5 days. However, this depends on the complexity of the design and the overall quantity ordered.
2. Do I have options for the backing on my PVC patches?
Yes, you will have different choices in backing types. This includes velcro, sew-on, or glue. The type you select depends on how you plan to attach or stick them to your fabrics or other surfaces.
3. Are PVC patches durable?
Yes, they are strong and long-lasting. They can last for years without even losing their color or shape when they are manufactured in a professional factory.
4. Can I make a customized design on my PVC patches?
Yes, you can. Factories can design custom shapes, logos, colors, and text according to your design. This will make your patch feel personal and distinctive.
Conclusion
Creating a PVC patch in a factory is a detailed process that turns a simple idea into a finished product. From sharing your design to moulding, filling, heating, trimming, and final packaging, every step plays an important role.
Following these steps carefully ensures the patch is clear, colourful, and durable. Custom PVC Patches designed in a factory combine creativity and skill to produce professional-quality patches. With the right process, your ideas can easily become attractive and long-lasting patches ready for use or sale.


